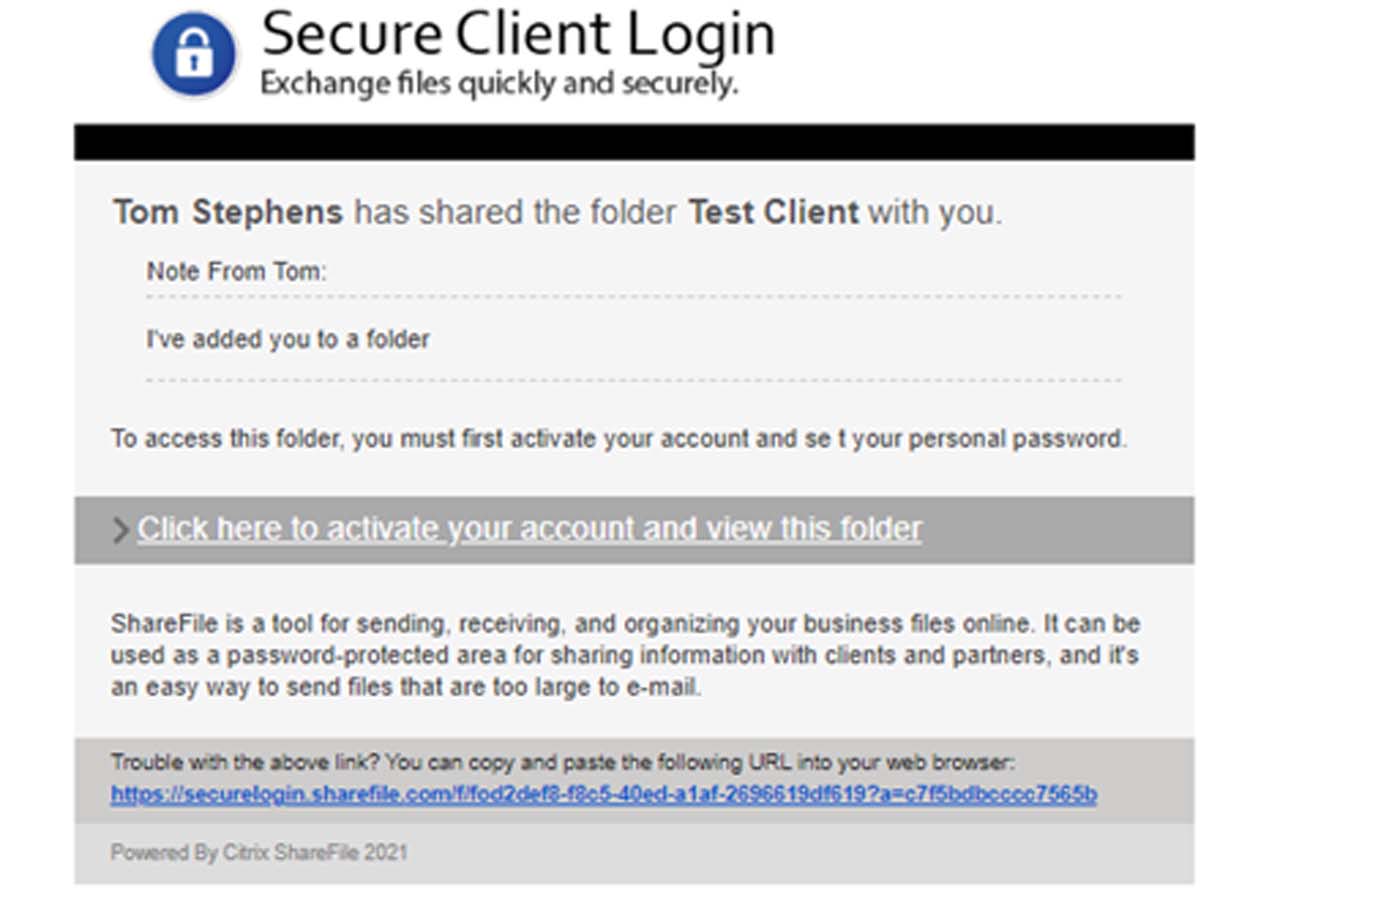
You will receive an email from me at mail@sf-notifications.com saying you have been added to a folder.
From here you will click on the link that says "Click here to activate your account and view this folder
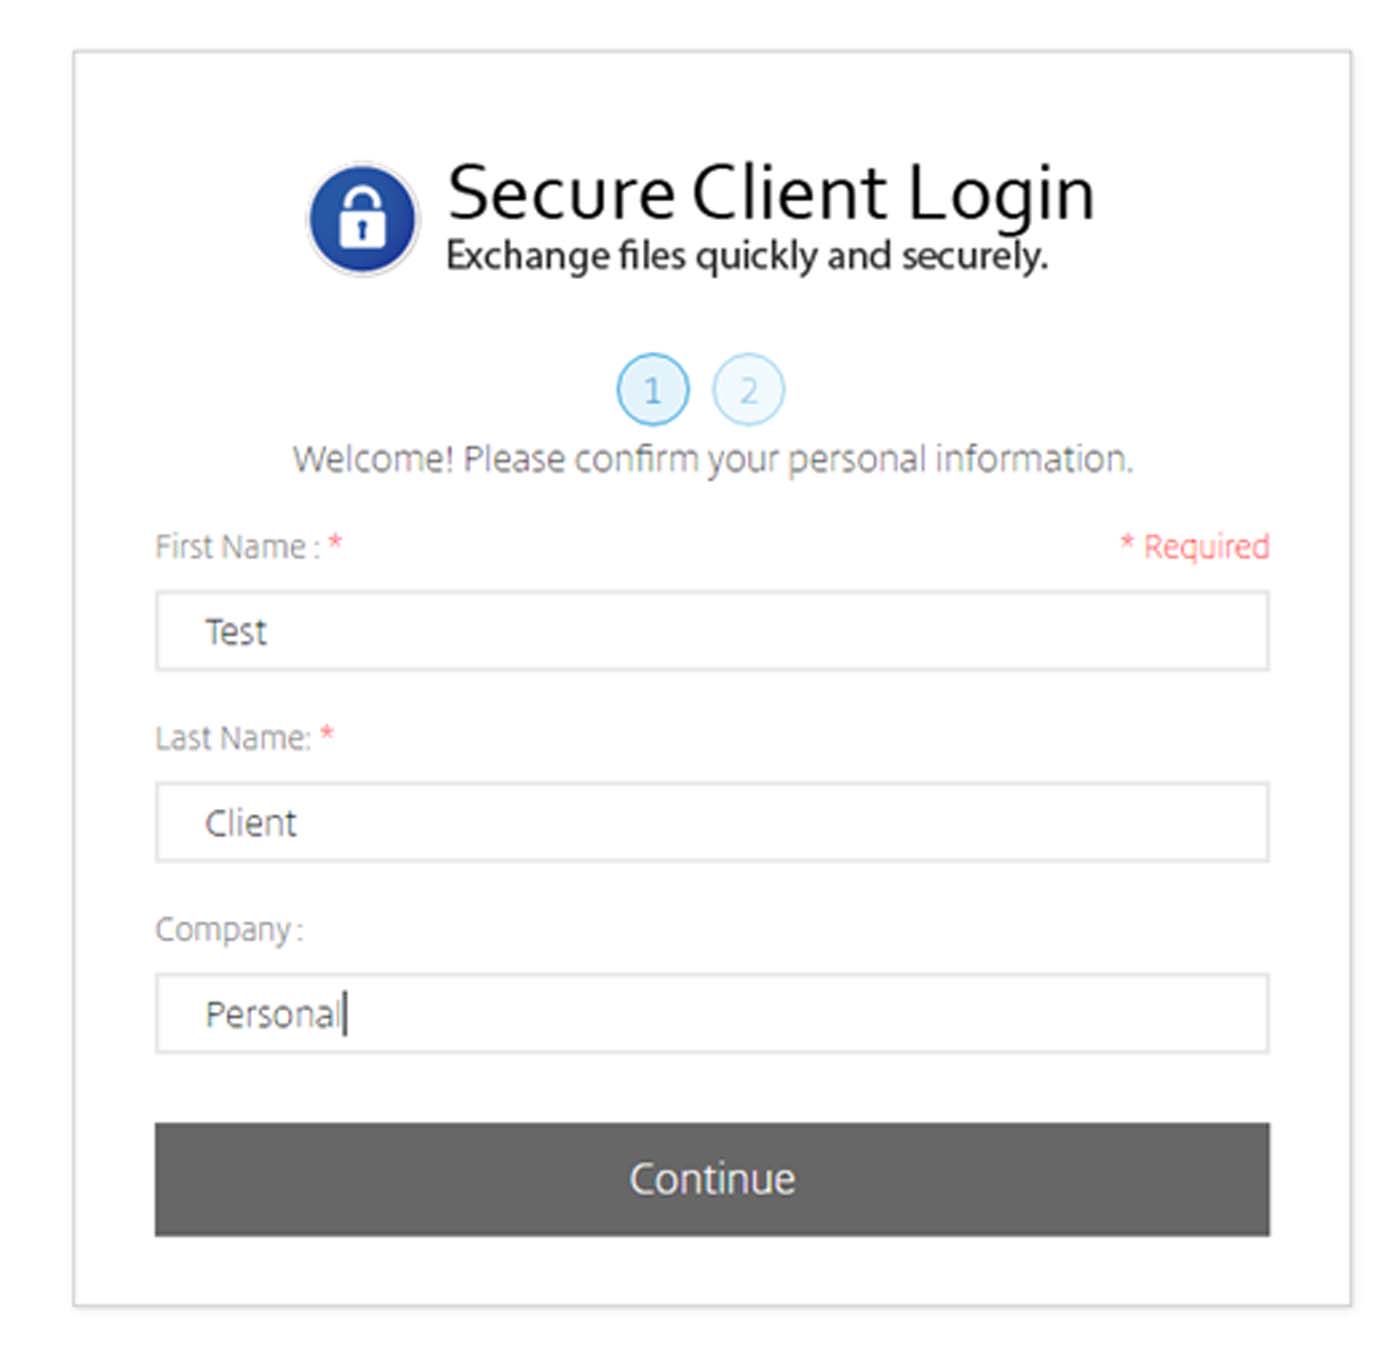
Next step is to confirm your name and company. If this just for you, just type in 'personal
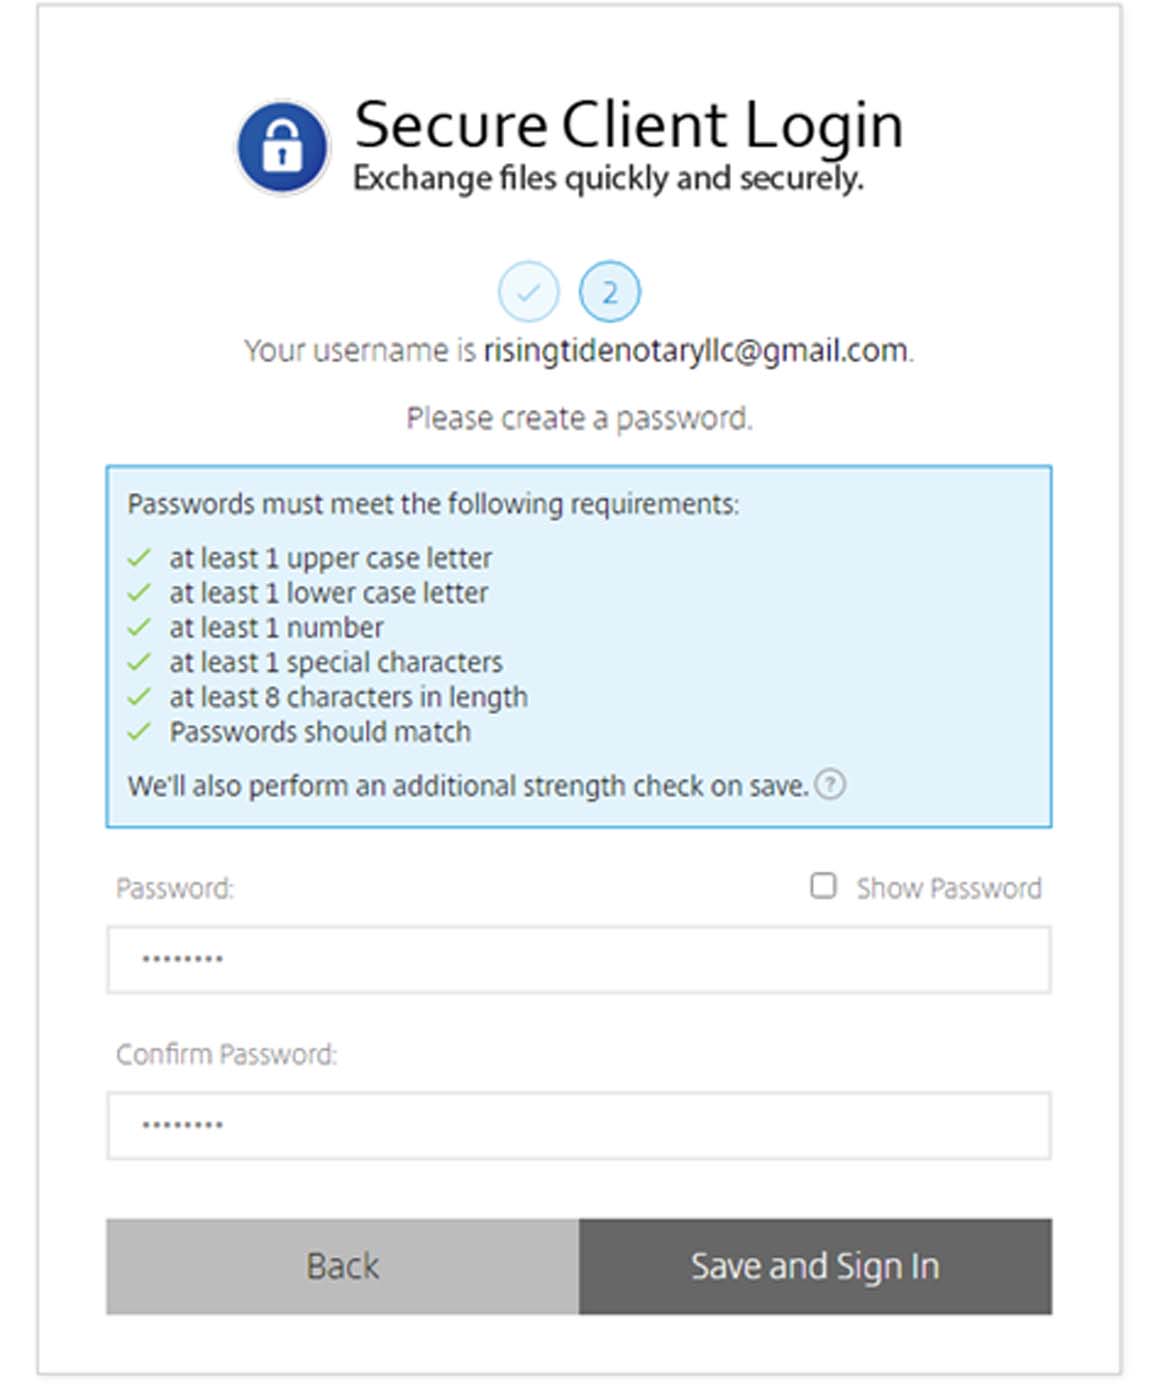
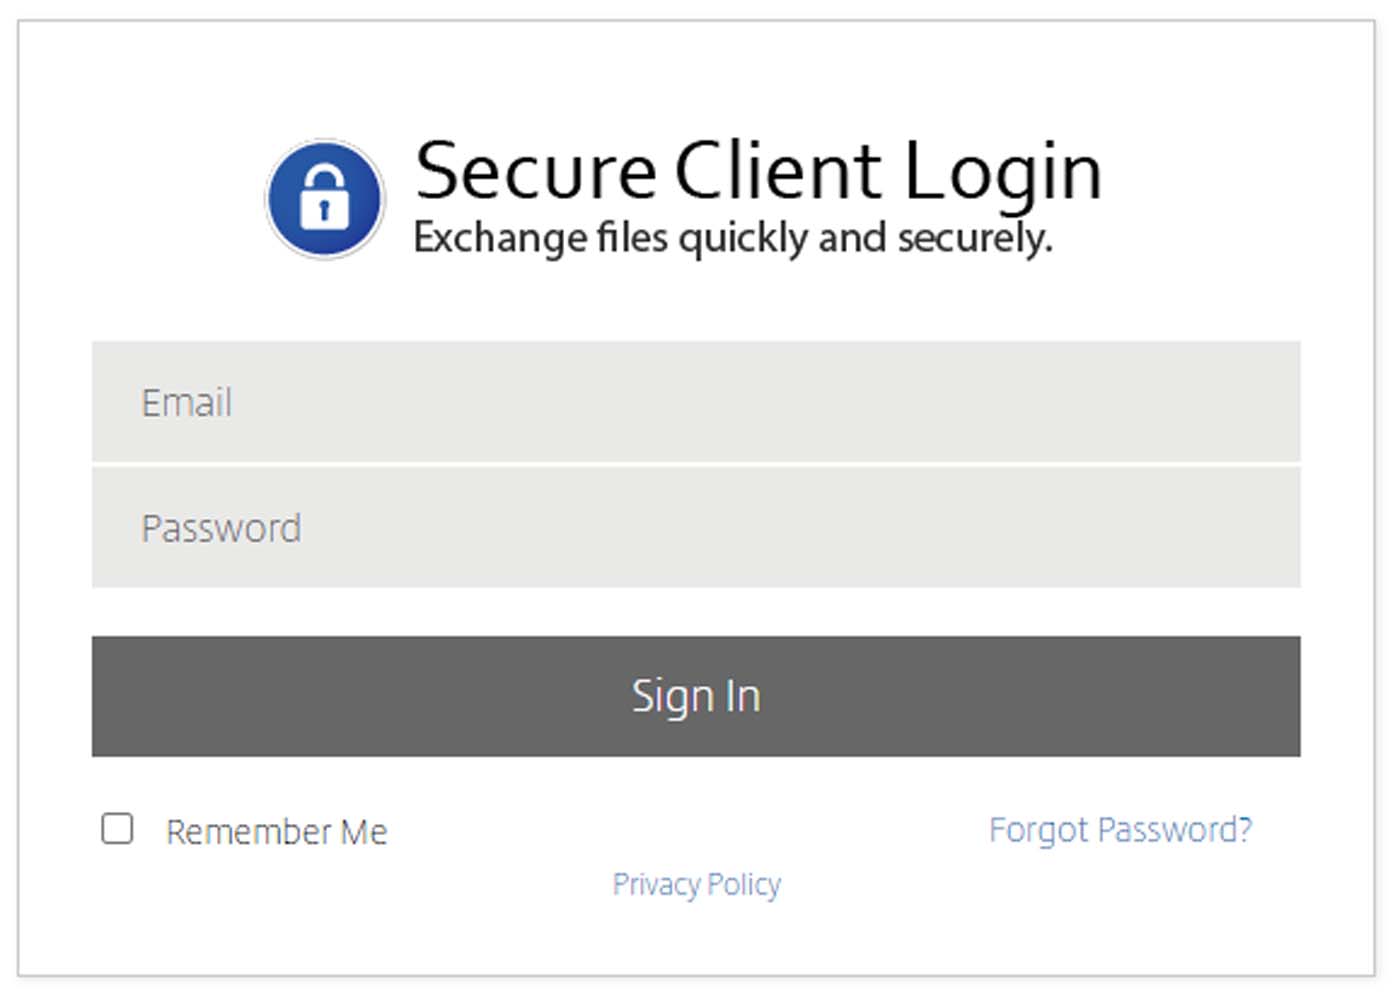
Once you finish that and select continue, you will create a password
Once done, hit Save and Sign in and that will have created your account for you
***Important*** Your credentials for logging into this account in the future will always be your email as your user name and the password you created.
Navigating the platform to be able to upload documents
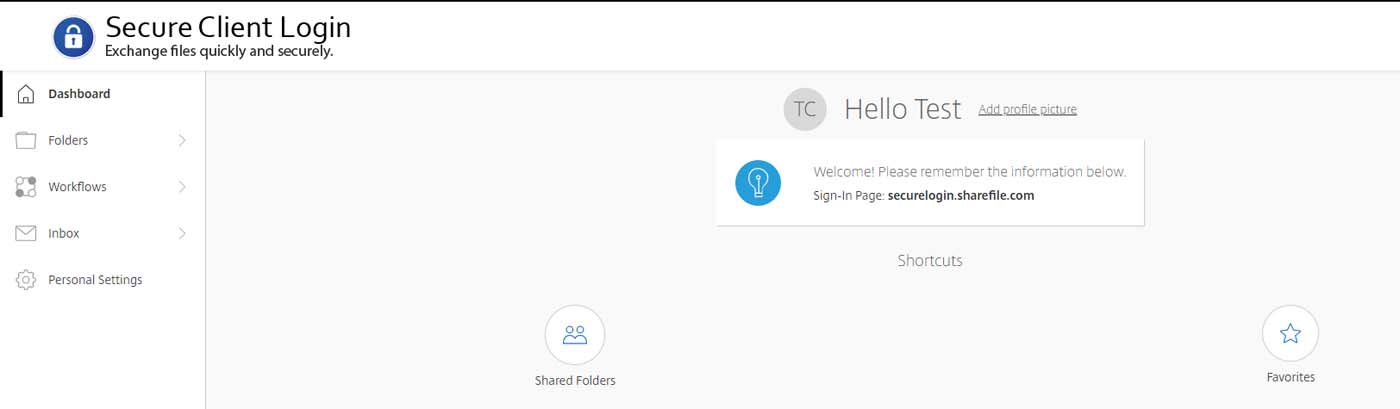
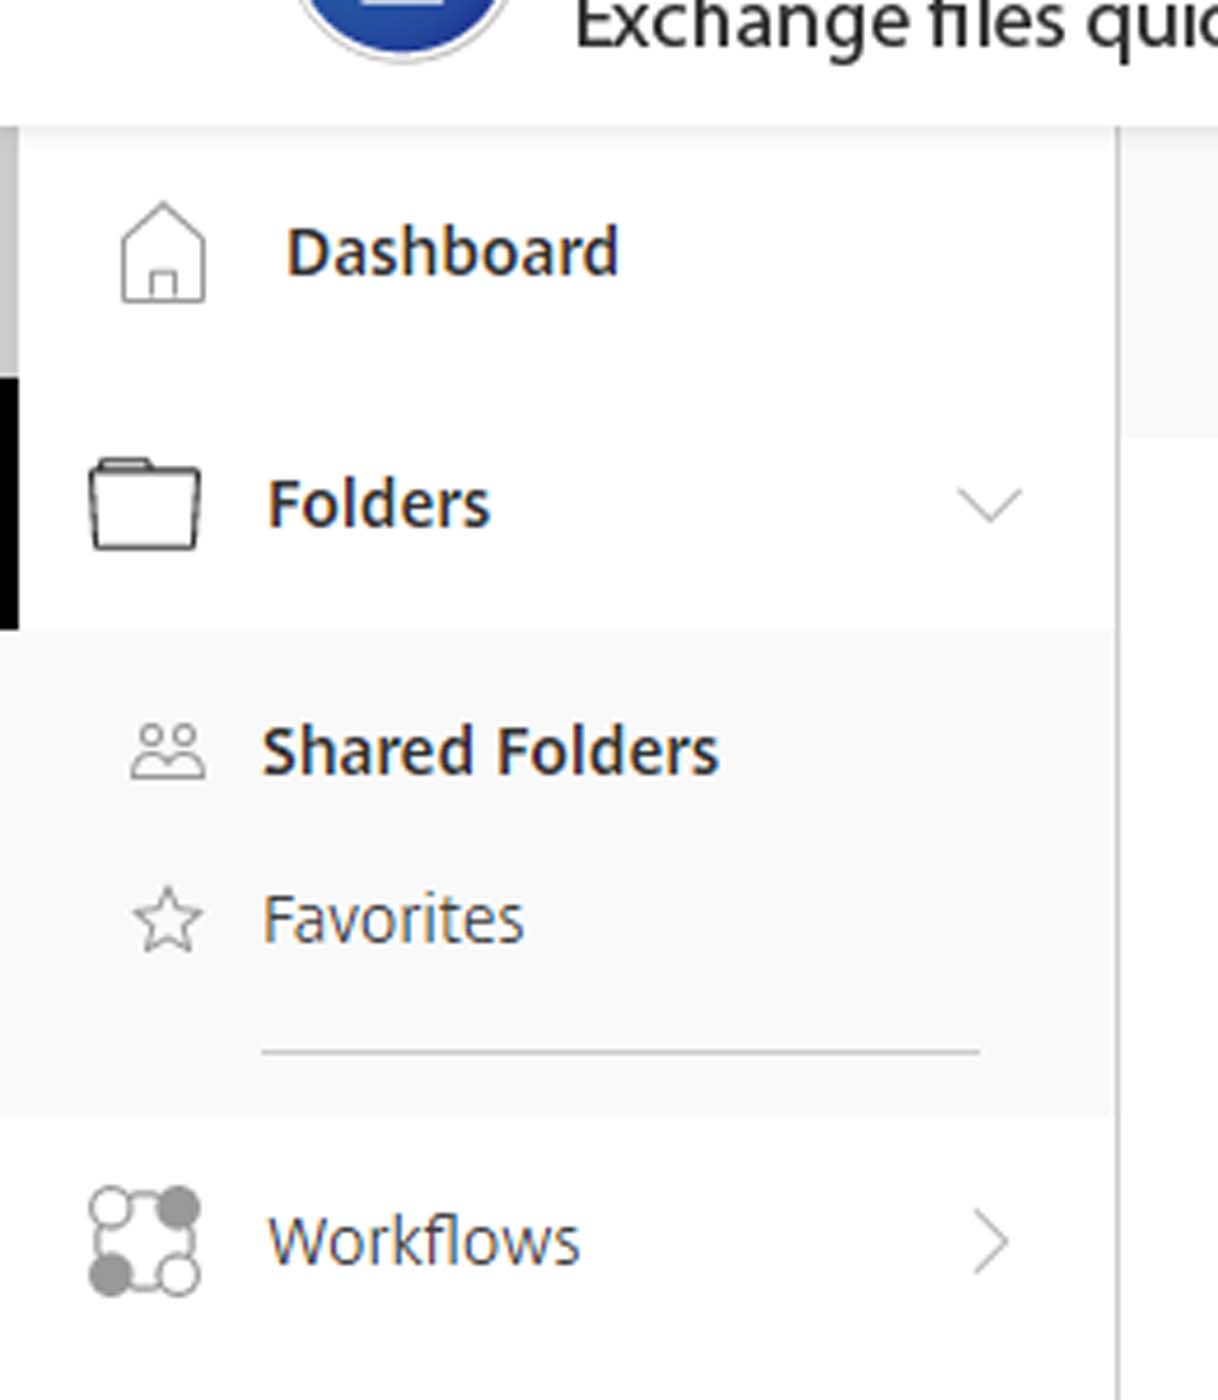
While logged in, this will be the first screen you see. The dashboard. To view the shared folder you need to access
Click on folders in the left hand sidebar
Then click 'Shared Folders' in the dropdown
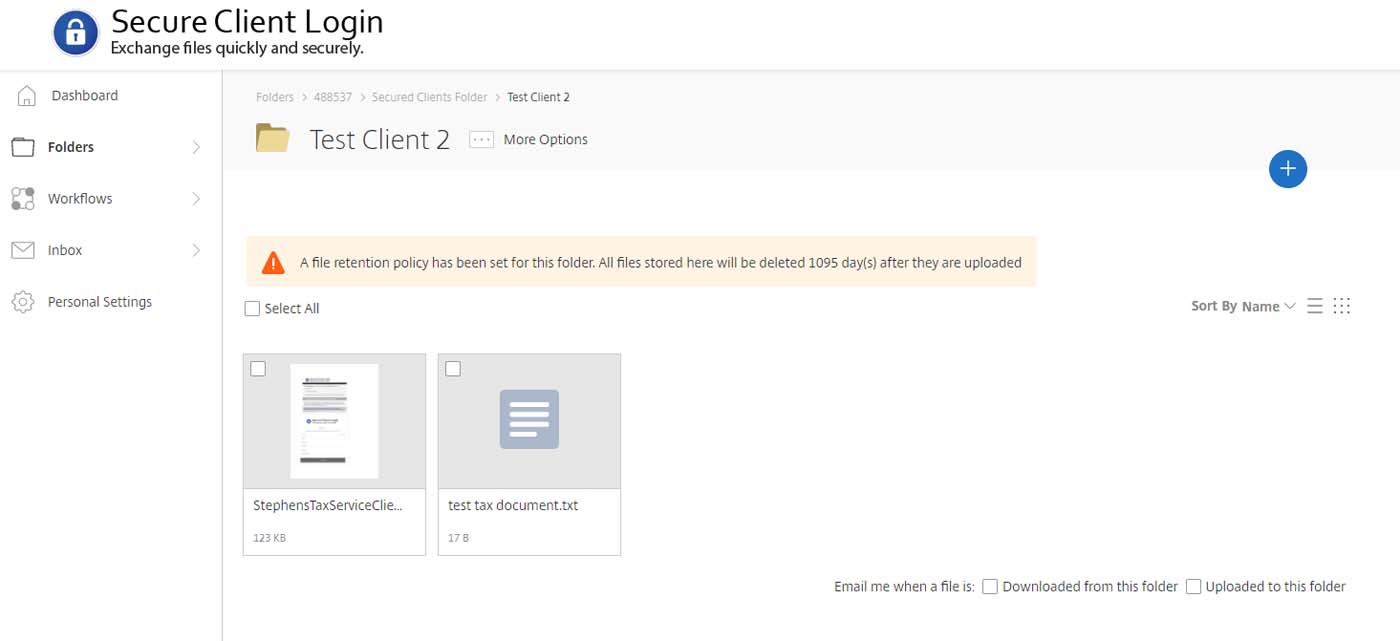
Once you click on Shared Folder, you should see the folder with your name on it which is the secure folder you will add documents you need to share with.
To upload, first click on the plus in the top right hand corner
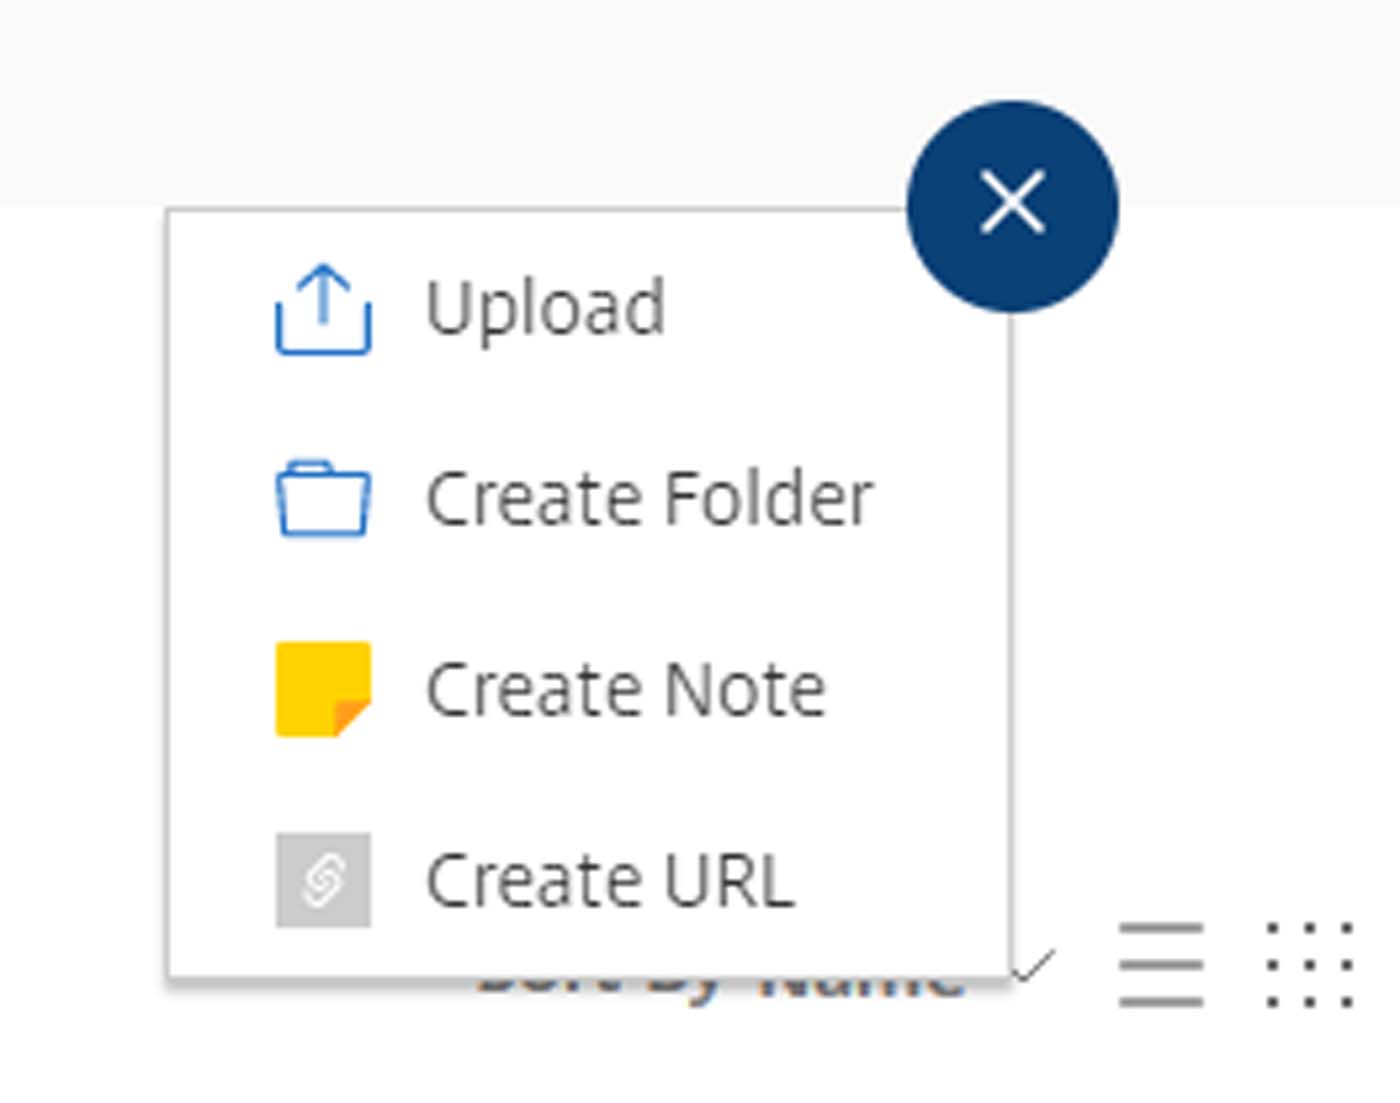
That plus will have a menu, and you will click on 'upload' from that menu.
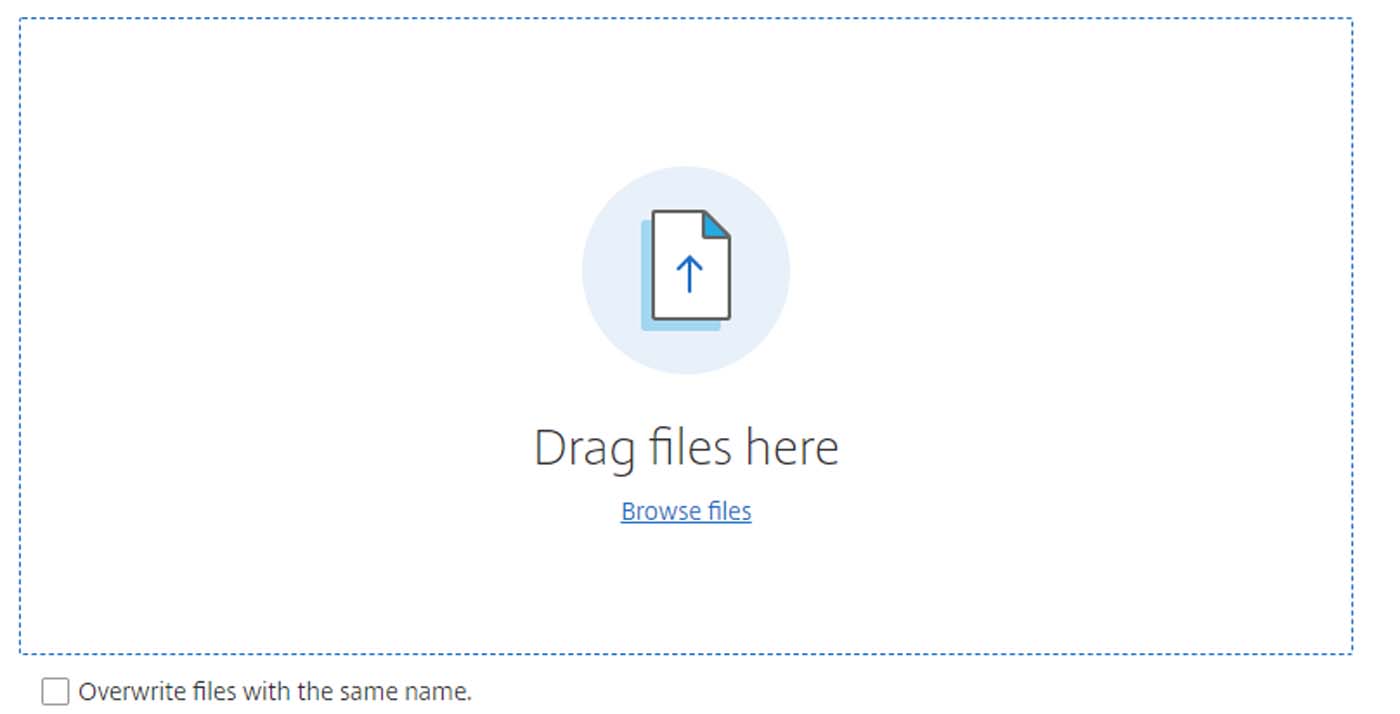
From there, select the files you want to have added to the folder by browsing your computer, or simply dragging the files and dropping them in the window when it advises you to do so.
Once the files are uploaded, I will receive an email and be able to go in there and get to work.
Logging back into to access your account and files
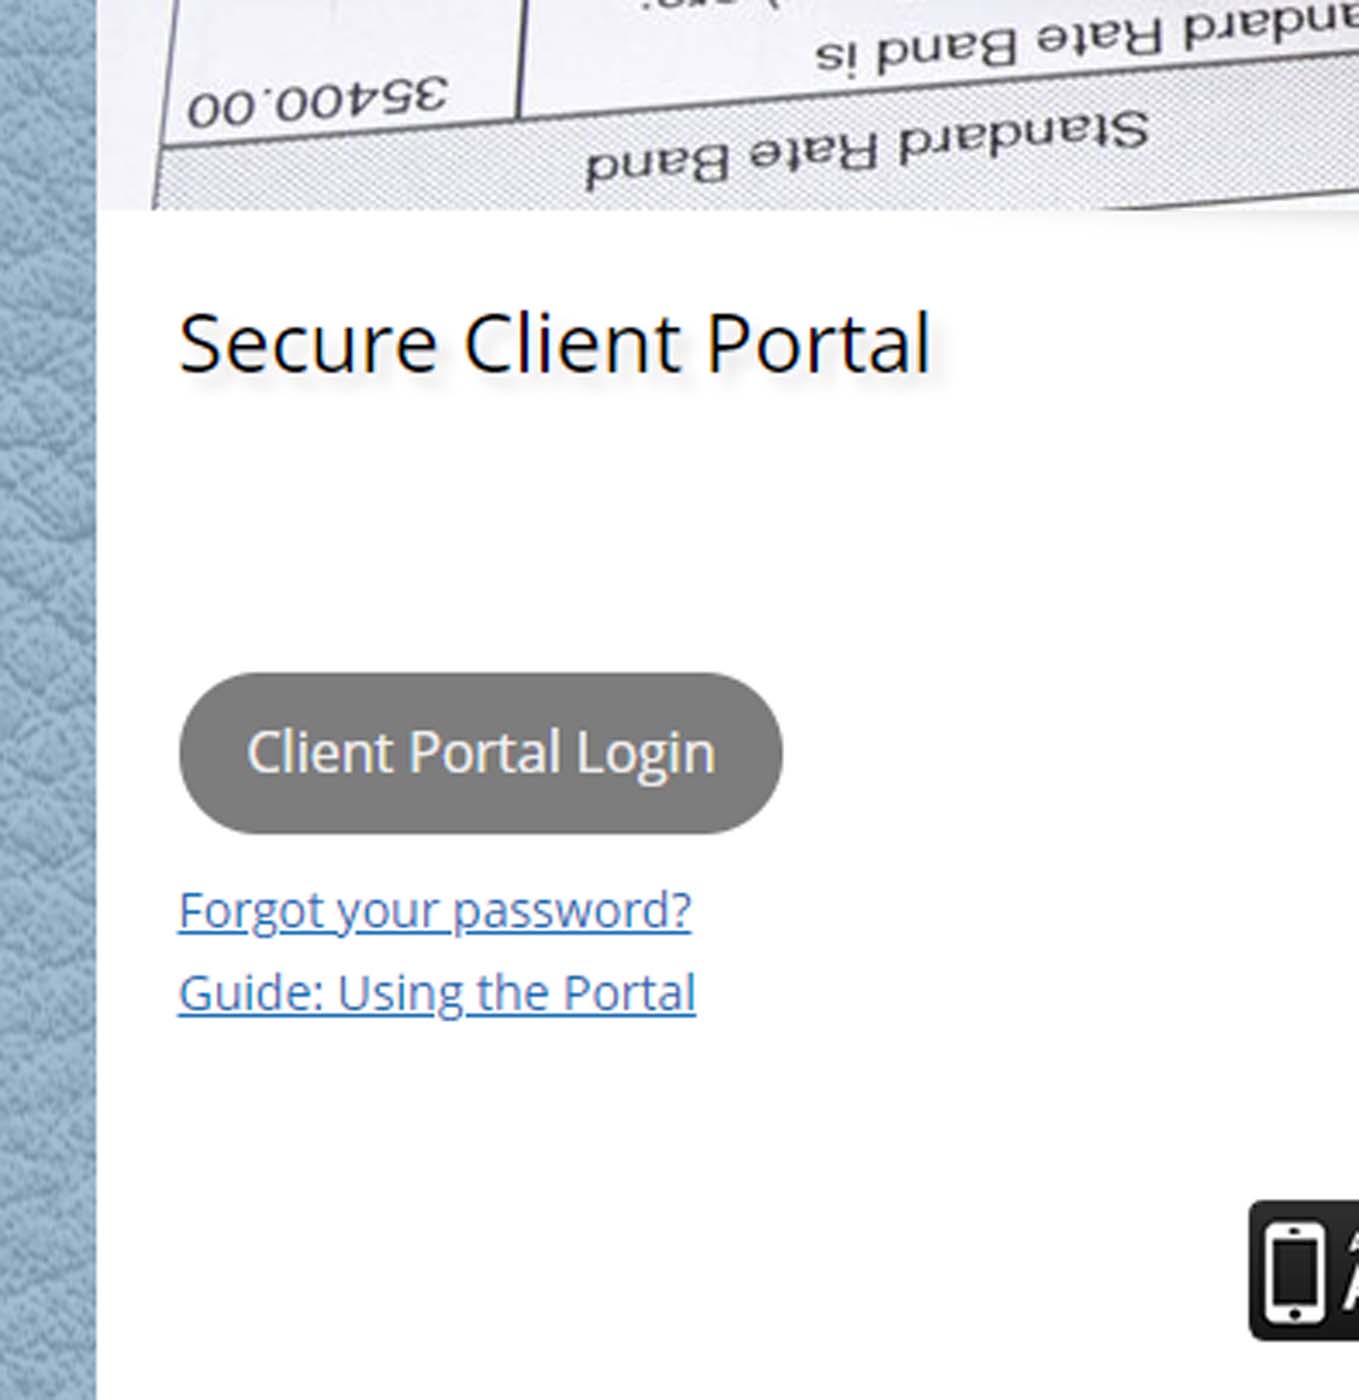
To log back into the account, simply go to my website, click on 'Client Portal' in the navigation menu at the top, and on that page will have the 'Client Portal Login' button which will take you to the login screen.
Again your login credentials will be your email address as well as the password that you created.